Camping in the rain

Tips for car camping in the rain and enjoying it

Car camping in the rain can be a fun adventure. The secret to camping in the rain and having fun is in being prepared and having the right equipment.

Three months out of the year, going on a camping trip in the PNW means risking getting rained on. Despite what some may say, you can absolutely have a good time camping during the Fall, Winter, and Spring seasons if you are prepared. As a bonus, because of the rain, there are fewer people out in the woods, giving you more peace and quiet.

Here are my top tips for car camping in the rain.

Why do I emphasize ‘car camping’ in the rain? I do that because there are lots of varieties of camping and I want to make it clear that we are talking about going camping where your car can make it to, or very close to your camp site. Check out my post on the different types of camping for more information!

Table of Contents

Preparing Your Tent and Gear

Having everything you need, and having it ready to camp in the rain is the cornerstone of having a good time camping in the rain. To that end, I suggest making a list of everything you will need to take with you on your trip and then making sure all of that gear is waterproofed. Forgetting things like extra paracord for the tarps can really put a damper on your fun!

Make sure your gear is waterproof

No one likes wet gear, it just makes everything harder and more miserable.

If all your gear is new, it is likely still waterproof, but if you have had it for a while, or you suspect it might not be as water resistant as the tag claims, you may want to add a little more protection to it.

For your jackets, the best thing you can do is wash and dry it according to the manufacturer’s recommendation and then apply a DWR (durable water repellent) spray to it. If you aren’t sure if your jacket needs it, sprinkle some water on it. If nice round beads don’t form, or worse yet, the water soaks in, it needs to be treated.

Practice Setting Up Your Tent Before You Go

Setting up a tent on a dry day can sometimes be a challenge. Trying to erect a tent when the wind is blowing and rain is falling is a whole different level of suck. If you aren’t familiar with how to set up your tent, find some room, and take a few test runs. Even if you have used it before, a refresher in the fastest way to get it up and get it dry will make doing it in the rain a much easier project.

Bring The Right Sleep System For Cold Weather Camping

Even if you have a tent with a waterproof floor and ground cloth, sleeping on the ground during the wet season is different than during the summer. Most people don’t realize that the bulk of your body is lost not to the air around you, but to the ground. Additionally, because you are laying on the insulation in your sleeping bag, it offer little to no protection on the bottom.

Trust me, I’ve had more than a few nights where my inflatable sleeping pad failed me and while I was warm on top, the side touching the ground was miserable.

Bring The Right Sleeping Pad

To avoid losing body heat to the wet ground, make sure you have a sleeping pad that has a high enough insulation value. You may even want to double down with a combination of an inflatable pad on top of a foam one. Anything is better than nothing, but not enough will make for a long cold night.

The Right Sleeping Bag For Camping In The Rain

The right sleeping bag for car camping in the rain is a little more of a wide open subject. You likely don’t need to go out and buy special sleeping bags for camping during the winter if you are car camping, as you can always bring extra blankets. There are a couple things to keep in mind though.

Down sleeping bags will always be the lightest, warmest, and most compact sleeping bag that you can find. The tradeoff is that if the down inside gets wet, it loses most of its insulating properties and can be a pain to dry out.

Synthetic fill sleeping bags on the other hand, take up more room, and are heavier, but are generally cheaper than down filled bags. Additionally, they stay warmer when they are damp/wet and we all know how wet a bag can get if there is condensation on the inside of your tent, or worse yet, there is a leak.

I have an array of bags, but for light-duty camping or sleeping in Leif the Adventure Van, I stick with my old Slumberjack 0°f bag that I don’t think they even make anymore. It is big and bulky but keeps me nice and warm until it gets down to freezing. We will talk about the lie of sleeping bag ratings another day.

If you have someone you would like to snuggle with, I suggest a pair of rectangular bags that can zip together. Check out the sleeping bags for couples on Amazon and you will see what I mean. They are obviously not something you would take backpacking, but they will offer you the ability to snuggle up and keep each other warm on a cold night in camp.

I did some looking and the closest thing I’ve found to my Slumberjack is the ALPS Redwood -25º (Amazon Link). Two of these can be zipped together to make a snuggly warm bag for two.

Bonus Tip: These big sleeping bags have enough room in them for your clothes in the morning. So stuff your morning attire in your bag with you and you won’t have to put on cold, damp clothes.

Keeping Your Head and Toes Warm

Cold in your sleeping bag even with a good sleeping pad? Don’t forget about your head and toes!

The one thing that sticks out of your sleeping bag pretty consistently is your head. You can stay a lot warmer on a cold, wet, PNW night in a tent if you put on a warm hat. A basic stocking cap is all you need to keep your noggin warm (and ears). Trust me on this, it makes a huge difference. Any stocking cap will work, from your trendy Carhart beanie, or the Appalachian Gear Company beanie that I keep in Leif for cold nights.

One of the most overlooked ‘stay warm’ items in a sleep kit is something to keep your feet warm. I use an old pair of wool socks when it gets cold out, but you can use whatever you like to keep those toes warm at night. Keeping my feet warm in some warm, dry, fuzzy socks at bedtime make a measurable difference in my comfort, and I’m sure you will feel the same way.

My alpaca wool beanie for camping on cold nights

Choosing the Right Campsite

Rain means water on the ground that you have to deal with standing and running water. An ideal campsite will be flat-ish but not so flat as to have standing water. Be aware of running water as well. You really don’t want water running through or under your tent.

Also look for a location that has trees or bushes to attach your tarps to. The more things you have to tie off to, the easier staying dry will be.

An important consideration is to not place your campsite in a spot that may flood. Flash floods kill people every year, don’t be one of them. A small amount of rain in the hills can dramatically raise water levels in streams, creeks, and rivers and no one wants to wake up with water flowing through their tent.

Creating Rain-Free Spaces

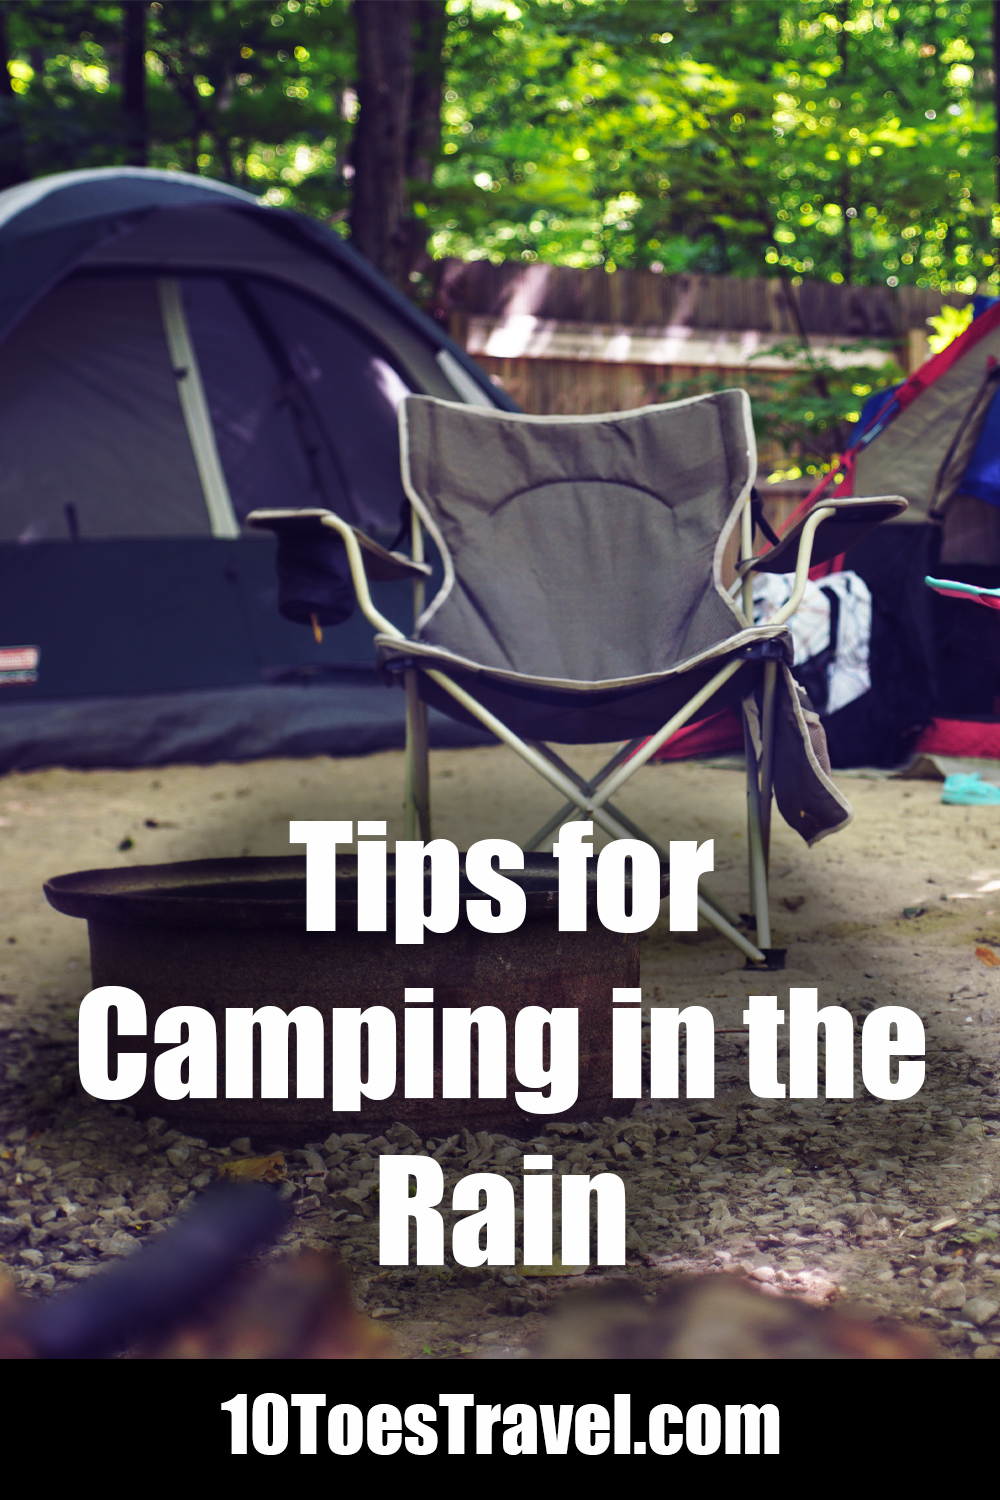
Creating dry places to enjoy the outdoors is key to camping in the rain. This is where learning the art of tarps is essential. Beyond that, having dry places to sit will make being out in the wilds in a rainstorm.

Consider not only putting up a rain fly over your cooking/relaxing area but putting a tarp up over your tent, creating a large dry area in front of your tent. That way you have a dry spot to stand when you get out of your tent. It may seem excessive, but it will feel luxurious the first time you get up and can get up and step outside to put on your coat instead of fighting to put it on in your tent.

Plan ahead and make sure water runs off the direction you want it to, that what you are tying to is stable and won’t break loose in the wind. If you decide to put a tarp over your fire, do make sure that it is high enough up to not melt. 8′ would be my suggestion and don’t make a huge fire, but you will want to experiment to see what works for you.

Here are some thoughts on tarping over a fire from Dan Cooke:

Nylon begins to degrade around 350°F. then proceeds to melt at over 400° F and would burn about 20° hotter than melting if memory serves correct.

My personal rule is “If you can not hold onto the tarp over the fire, it is too close or the fire is to big”

If the nylon Tarp reaches any of those milestones it will do just that. If it is Raining and the tarp is elevated above the fire enough to stand under, and pitched so the heat plume can spill out from the tarp, usually you get no damage to the tarp. The rain cools the tarp. In non raining conditions the tarp has to be higher to avoid damage. You would have to have too large of a fire, or too many lifting sparks to damage the tarp.

If you put it close vertically to the fire, or make the heat plume go up to a peak and spill out lower than that peak, problems may be encountered. Large sparks can transfer a lot of heat. The mass and temperature of the spark may be able to heat the nylon to degradation, melt and rarely burn.

Dan Cooke

Tarps, Ropes and Pole

Good quality tarps that are big enough to cover your camp are the core so winter camping in wet weather. These aren’t the fancy backpacking tarps made of ultralight nylon, but the good old 10′, 12′ or 16′ tarps you see at the hardware store.

  • Tarps
  • Paracord
  • Canvas clips
  • Adjustable Tent Poles

You can never have enough paracord. But it in 100′ lengths and buy several of them. It isn’t expensive and easy to work with. You can get 100′ lengths on Amazon for $10-12 dollars.

One tip I have for you is to never trust the grommets that come on your tarps. Time and time again I’ve seen them blow out when the wind picks up and starts flapping them around. My suggestion is to either learn to use a rock as a tie off on your tarp or alternatively buy some tarp clips. These bite down on the fabric, giving you a secure spot to attach your rope, and can be easily adjusted. They are a great way to secure a tent, particularly in awkward positions.

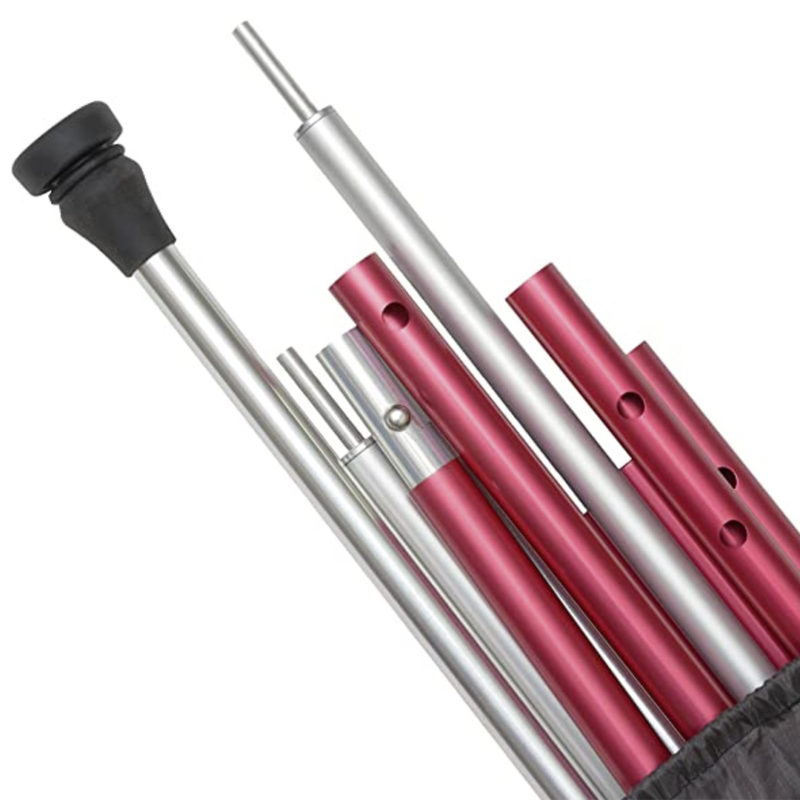
Now that you have tarps, rope, and clips, you might think about bringing along some adjustable tent poles. Yes, you can use trees if they are available, but a couple easy to adjust poles make life easier when you are trying to keep the corners of your tent up.

Looking at what is available, the Internet seems to like these adjustable tent poles by Green Elephant, but personally, I’m not a fan of twist-lock poles. I’ve had them either not lock in or else fail under pressure too often. Something that more positively locks into place like these tarp poles from Pariah is more to my liking.

Adjustable aluminum tent poles for your tarps
Adjustable aluminum poles for your tarp.


The Right Camping Furniture Makes All The Difference

Your camp furniture is what literally is going to keep your butt dry and give you someplace to cook on a rainy day. I’m guilty of not planning ahead and having enough seating and have always regretted it. The canvas pop out folding chairs are a simple solution, but your space and budget are pretty much the only limiting factor here. A padded fold-out rocking camp chair? Why not!

Give Thought To Your Camp Chairs

Your basic camping chairs will work to give you someplace to sit, other than the cold ground. Consider bringing along some cushions or other padding for lining your chairs. This will give them some added insulation that you will really appreciate. 

One simple and cheap solution for this is packing blankets. I’ve scavenged all mine from various places, but you can get them on Amazon, or at Harbor Freight for damn cheap. These are super durable, multiple use blankets, so I suggest having a few around!

zero gravity reclining chair for camping
The Right Camp Chair Makes All The Difference

You might want to also check out my post on keeping your back warm at a campfire. There are some good tips and tricks you may want to use in there!

Camping Tables and Kitchens

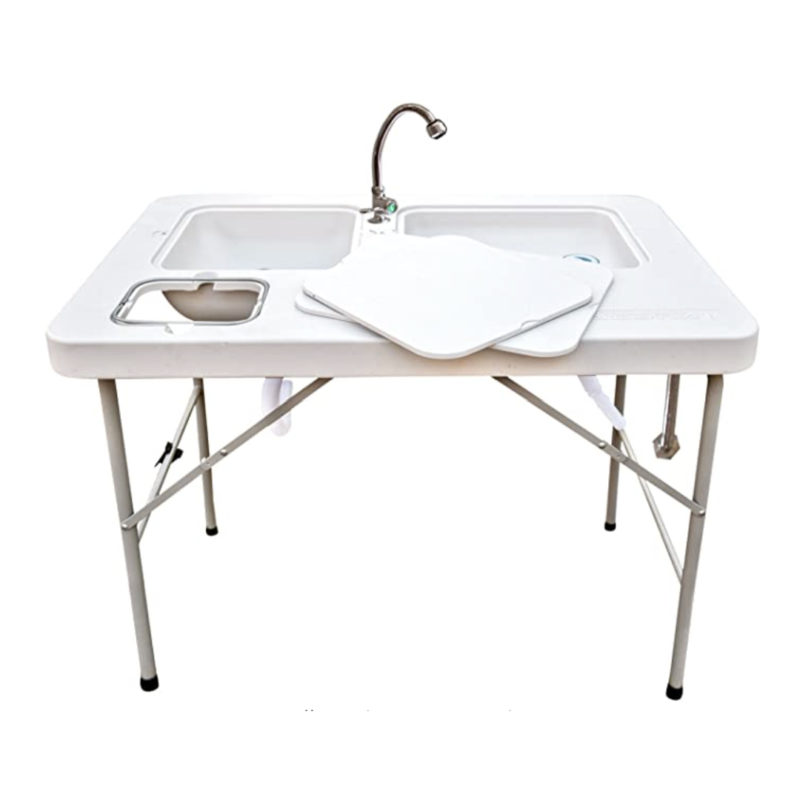
In the summer, there are usually picknic tables to use for cooking and eating at. In the winter, they may not be ideal. Either they are already wet, aren’t in the right spot, or are just not convenient for camping and cooking at.

I suggest taking along some tables for food prep and organizing. The ground will be wet and muddy, so you won’t want things down there. I’m a fan of the plastic tables, but you can again, get really creative and use things like a fold-out camp kitchen. Which I do suggest if you are staying multiple days. It is worth the room in the truck.

Portable camp kitchen with sinks.
A fold out camp kitchen makes camp cooking much easier.

Building a Campfire in the Rain

If you haven’t brought your own firewood with you, be sure to gather your firewood early and get it under cover so it can start drying out. Please do not cut living trees, as it damages the forest and won’t burn anyway. To build a fire properly, you will want the following:

  • Tinder – Light, dry fluffy material
  • Kindling – Small wood like sticks
  • Fuel – Larger pieces for once your fire is going

Once you have a good supply of firewood and tinder, you can get to building a fire. There are a lot of details to this, so I suggest checking out this post from MomGoesCamping on fire building. It covers most of the details.

FIRE BUILDING CHEAT - The Redneck solution

The absolute easiest way to build a fire in the rain or any other situation for that matter is to use a propane fuel weed burner. OK, now if I was totally rednecking it up, I’d admit to using a mix or diesel and gasoline, but that is way riskier and not advisable for most people. But seriously, a propane weed burner can be used to get even damp wood going and sustain a fire until it is hot enough to keep burning on its own.

Obviously this cheat comes with the disclaimer of ‘attempt at your own risk’.


Camp Cooking in the Rain

Cooking over a fire in the rain can be a real pain since rain falling on your hot food does it no favors. This is one reason many people tarp up over their fire in the rainy season.

Personally if I’m car camping, I always bring along a secondary way to cook, typically something like a Coleman 2-burner stove. This makes it easier to cook in wet/windy conditions and do things like making coffee in the morning. 

I’ve used both the propane camp stoves and the dual-fuel stoves and my personal preference is still with the dual-fuel. They are a bit fussier, but I feel they are a bit more adjustable. The propane camp stoves are bulletproof and dead simple to run, but I find it a challenge to get them to cook slow enough since the propane burns so hot.

Since you are car/truck camping, you might want to consider something even fancier and pick up a propane camp oven/stove combo. Yeah, it is severely overkill, but who wouldn’t want hot, fresh cinnamon rolls and coffee on a rainy morning while camping? 

My dad got one a few years ago and LOVES it!

Keeping Your Camping Gear Dry

Regardless of what else you have going on, your gear will get wet if you don’t put it in something. Keeping your essentials in waterproof containers will make life easier while you are transporting and camping. Plus they help organize things, which I particularly love.

For your general gear, I suggest Rubbermaid totes. I call out the Rubbermaid Roughneck totes specifically because they have proven to me to be nearly indestructible. I have one in my adventure van for firewood and others for storing food in. The lip design sheds rain even and the plastic remains flexible in very cold temperatures. I’ve had them loaded up with water and used them as buckets before and will hold more water than you will really want to carry.

The close securely, keeping most curious small critters from rummaging through your stuff, but can also be bungee corded closed for a little extra security.

Use dry bags to keep your electronics dry and functioning. These can either be specifically designed dry bags for electronics, or you can be like me and just drop them in a plastic freezer bag, suck out the air and call it good. A super cheap and easy option for protecting cell phones and small tablets from moisture, I always keep one in my pack just in case when I’m hiking in case I get caught in a rainstorm.

Dry bags will keep your extra clothes and soft gear dry. For all your extra clothes, blankets, and so on, if you don’t want to keep them in a tote bin, you can put them in a waterproof duffel or stuff sack. This way you always know that you will have some spare clothes that are dry and ready for you in case you get wet.


Keeping Yourself Dry

Inevitably you will have to be in the rain at some point while you are camping, and having good rain gear will make that bearable and even fun. There are three layers to pay attention to here. Your shell to keep the rain/water off, the middle layer to keep you warm, and the base layer to keep you dry and comfortable.

Start with a good, breathable dry shell. Vinyl rain gear is severely waterproof but doesn’t breathe. Synthetic materials like Gore-Tex require more maintenance to remain waterproof but are more comfortable in the long run.

Underneath that, you will want some ‘keep you warm’ layers. Now staying warm for me is rarely a problem, so I’m generally good with a base layer and shell, but you may want a fluffy middleweight layer to keep you warm. My suggestion here is a wool layer. Wool remains warm, even when damp, and will keep you warm under the worst conditions.

While Merino wool is the most commonly found material in this category, I have to say Alpaca wool as my favorite. They sent me a short sleeve shirt a while back and it is my go-to warm layer under my coat. For me, it is the perfect weight for staying warm without being too hot. As a side note, I have their beanie, and it is the only one I’ve ever worn that I liked, EVER! Typically beanies are too hot for me and I wind up pulling them off. Theirs is just the right weight to add some warmth without cooking me.

Under this, a synthetic base layer to wick away moisture/sweat is critical for staying warm. It also protects your skin from breezes that will strip away your warm. There are a ton of choices in this category, just be sure to find some that fit snug, and is good quality.

Drying out Wet Clothing and Camping Gear

Inevitably things will get wet. Plan a place by your fire or at least under your tent to dry your boots, jackets and other clothes.

Drying boots and shoes by the fire can be a challenge. Be sure to not get them too close to the heat as plastic can melt and even leather can suffer if warmed too much. I suggest putting them on sticks a couple of feet from the fire and turning them as they warm. Alternatively, you can put in warm (not hot) rocks inside them to help speed up the drying process.

For hanging clothes and other items, consider running a second line along your tarps ridge line on the underside for drying shirts, socks and the like. They will stay dry there and the warmth from the fire can help speed up the drying process.


Some Last Thoughts on Camping in the Rain

This should get you started with camping in the rain. Don’t be afraid to get out and start exploring the wilderness in the off season. There are amazing things to see in the rainy months and with the right preparation, it can be a lot of fun. Plus if you go when it is raining, you won’t have to fight for camping spots.

Plan ahead, stay dry and go explore!

PNW tested tips for camping in the rain
5/5 (2 Reviews)

Table of Contents

About The Author