Where to put the spare tire on Leif, my 1999 Chevy Express, has been an issue ever since I converted it to a camper.
Underneath was not an option since the original carrier was missing and finding a replacement was not going well. That left on rack on top or a rack on the back door. Having the spare tire living inside the back was just eating up too much space.
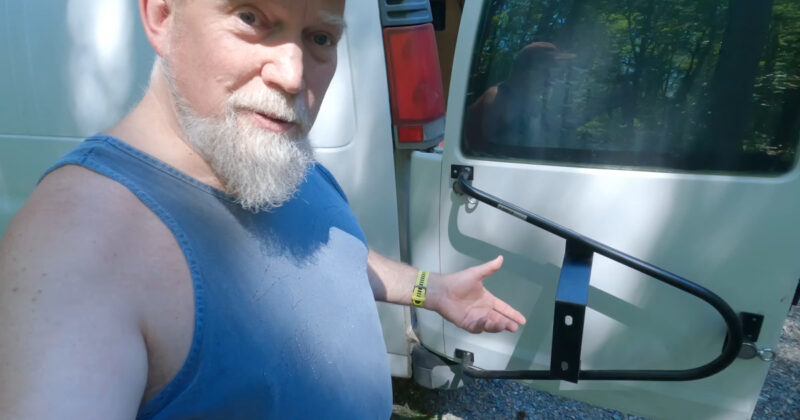
The answer I decided on was a Surco 200 “Universal” rear door tire carrier.
My big frustration came in the form of there being no installation instructions, so I had to do some research and use my redneck ingenuity to make it happen. This is my journey in installing a Surco 200 on my van, I hope it helps you with installing yours.
Disclaimer: I am not a professional. I am a redneck, doing this by the seat of my pants. Follow along at your own risk.

Surco tire carrier installation video
What you need for this project
I ordered my tire carrier directly from Surco, but you can also find them on Amazon. Beyond that, the only tricky piece to find will be the 16ga steel plates for inside the door. I’ve included link for some steel on Amazon, but if you have a metal shop in your area, I would go talk to them first. The same goes for your bolts and nuts, you should be able to find them locally, but they may or may not be cheaper.
Surco 200 Tire Carrier
Vycor Flashing
16ga steel plates
Grade 8 Flange Coarse Thread Bolts
Grade 8 Flange Coarse Thread Nuts
Tools used:
Milwaukee Drill
Universal Socket
Sockets and Ratchet
Vice Grips
3/8″ Drill Bit For Metal
Door Panel Removal Tools (optional)
Opening up the door
The first step will be to take off the interior trim panel. On my van, it is held in place by a half dozen or so spring clips. I removed mine with a flat pry-bar, which is thin enough to get behind and push on the clips to get them to release.
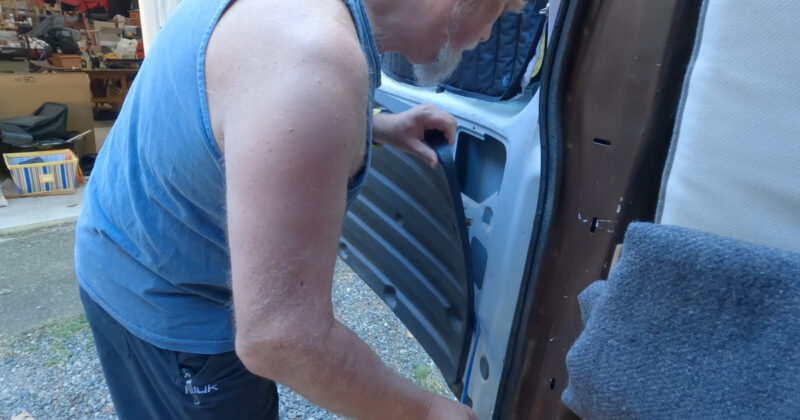
Verifying the fit and placement of the carrier
With the panel off, I verified that the location I wanted to install the tire carrier wouldn’t interfere with anything inside the door. Luckily, there is very little inside that door, and the bolts weren’t going to be in a spot that interfered with the lock, which was my big concern. I used some big magnets I had lying around to assist with this.
With the location confirmed, I marked the hole location and got ready to make permanent changes.
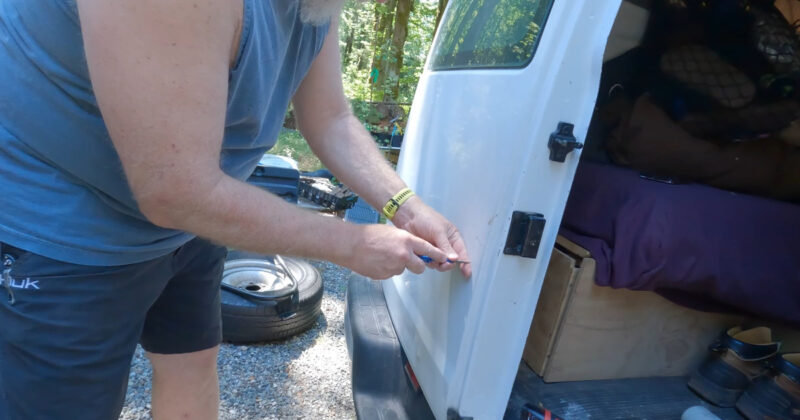
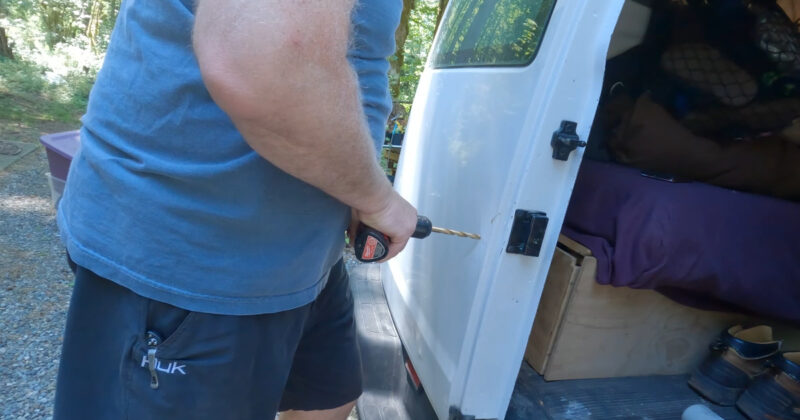
Drilling the holes for the carrier
Having marked the locations earlier, I pulled the carrier off and got ready to drill. First I went around and put a dimple at each of the locations with a scribe to help prevent the bit from walking away from where it should be.
Using a 3/8″ drill bit for metal, I punched my 4 holes in. To help prevent rust, I then hit them with some white paint on both sides.
Modifying the tire carrier
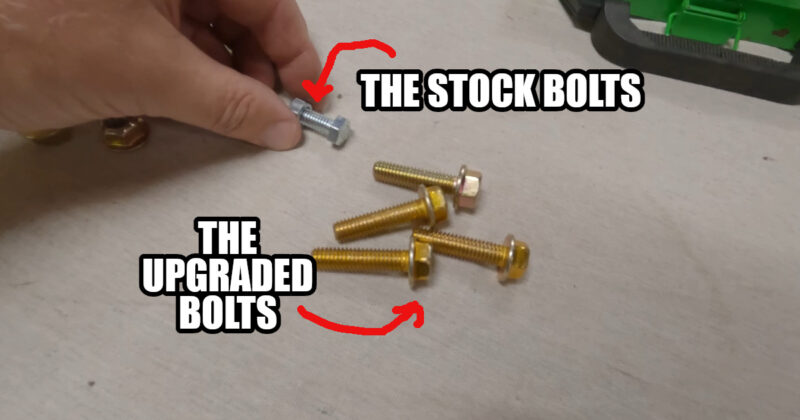
A universal complaint that I read online was that the bolts that come with the Surco 200 tire carriers are too wimpy. Everyone’s suggestion was to upsize them one step.
To that end, I bought some new 1 1/2″ grade 8 coarse bolts and locking nuts. This required redrilling the holes in the carrier. Once that was done, I hit that with some black paint to prevent rust.
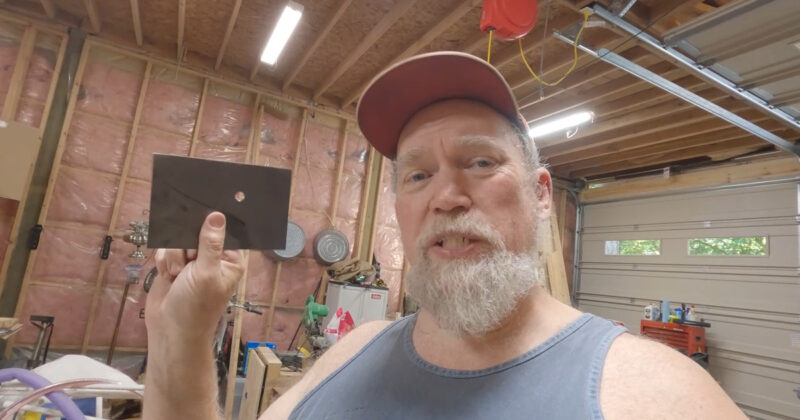
Drilling the plates
The next step was to get the backing plates in place and drill those. I used a magnet to hold them in place while I marked them, but if you have a friend helping, they can hold them for you.
After they were marked, I drilled them out with the same drill as I modified the rack with. For added insurance I added a piece of Vycor to the side that would face the door. I was punting here that it would prevent rust and stop any rattles. Since I had the Vycor out, I also cut some for the feet of the carrier to prevent it rubbing the paint off.
FYI: If you have a better product or something similar to Vycor, feel free to use that. This is just what I had extra of sitting around.
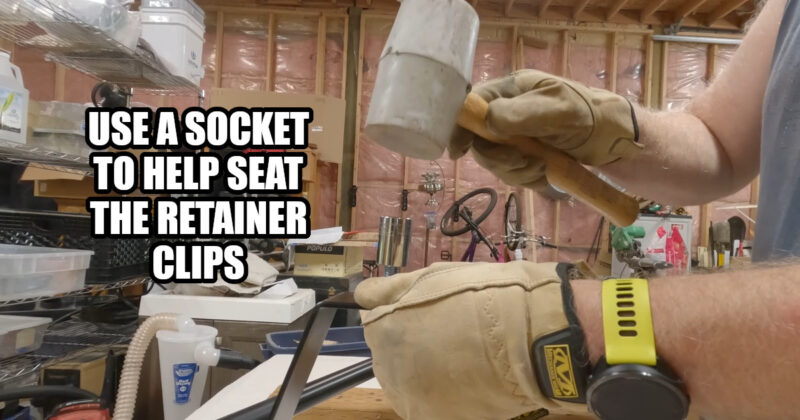
Adding the tire carrier bolts
The last step before mounting the rack was to attach the bolts that the tire would mount on. I had read that this was easier to do before getting it on the door. The kit included two bolts and retainers, so I got them started and then banged them into place using a socket and a rubber mallet.
Showtime – mounting the tire carrier
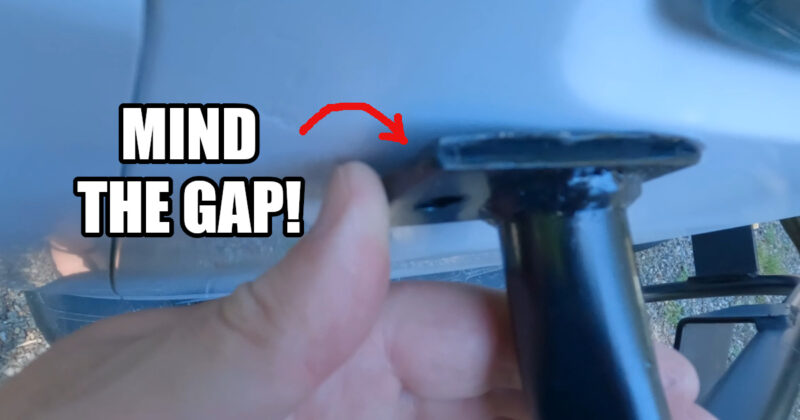
With the holes drilled, surfaces painted, and the tire bolts on the carrier, it was time to mount it. I started with the holes closest to the latch since I could reach them. I drove the bolts in with a universal driver. The Vycor makes it hard to get them through the holes in the carrier, the door, and the plate by just pushing.
The bolts through the holes, I started to loosly tighten down the ones on the latch side. Immediately, it was apparent that I would need more vycor to fill the gap between the carrier and the door, so I added a couple of small strips there. Looking at the latch side, the gap was even worse, so I added 3-5 additional layers to fill the gap.
Satisfied that I had enough sealant between the parts, I tightened everything down. The easiest way to do this (short of having someone to help) is to use a Vice-Grip on the nut side and ratchet the bolt tight from the outside.
All four bolts tight; the only thing left to do was to mount the tire. A little jostling to get the bolts to slide around in their slots to match the holes in the tire, and the project was complete.

Final thoughts on mounting a Surco 200 tire carrier
While I am pretty sure my metal backing plates were bigger than I needed, I’m very glad I put them on. Some people suggested big washers, but I don’t feel that is really enough. The suggestion to upsize the size and quality of bolts seems founded as well. I wouldn’t want the whole assembly breaking loose on the road somewhere.
Now all I have left to do is find a couple of used lug nuts to put the tire on with. Leaving them on the bolts with standard nuts is probably ok, but a couple of used tapered lug nuts to protect the wheel and the threads seems like a good idea.
If you are pondering mounting your spare tire to the back of your van, this is a very doable project even if you have minimal skills.