You planned this trip for weeks. Three days deep in the Okanogan, nobody around, enough quiet to finally make a dent in that project you’ve been putting off. Maybe knock out a few hours of work in the morning, hike in the afternoon, stream something decent before you fall asleep.
Then you get there and your phone has no bars. Your hotspot has no bars. You might be better off on the Moon.
The project sits. The evening entertainment is staring at trees — which, don’t get us wrong, is genuinely great — but by night two you’d kill for Netflix and a decent connection to send your files.
This is a PNW camping problem, and it’s a different problem than the one everyone else is solving.
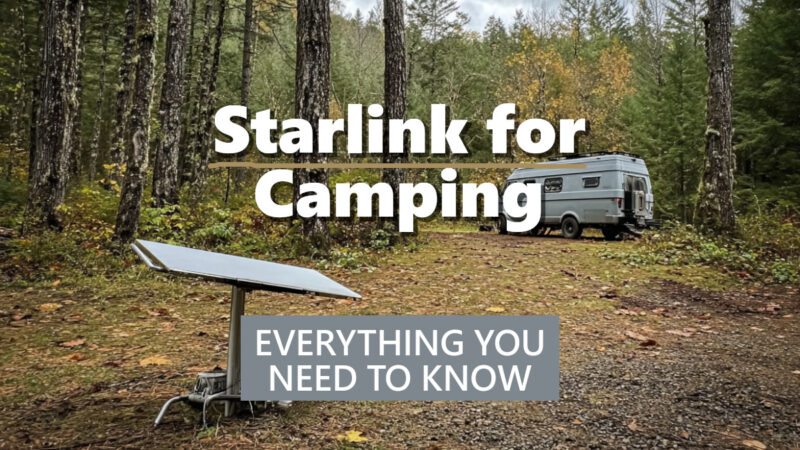
Most Starlink van life guides are written by people filming in the Utah desert or the Arizona high plains — wide open sky in every direction, dish points up, done. Out here it’s old-growth Douglas fir, steep river valleys, and canopy so thick the sky is a rumor. The same setup that works flawlessly in Moab will spend half the night dropping signal because a cedar branch is sitting in the wrong quadrant.
This guide is written for PNW campers. We’ll cover the gear, the power reality, and — most importantly — what to actually do when you’re parked under 200 feet of trees and need to get a signal.
Why PNW Campers Are Going Starlink
There’s a version of this conversation that applies everywhere in the country. Starlink beats campground Wi-Fi. It’s faster than a cellular hotspot in a dead zone. We know. But there are a few reasons the value proposition is even stronger here than anywhere else.
Cell coverage in the PNW isn’t just bad in the obvious places. Sure, the Okanogan Highlands and the North Cascades backcountry are dead zones — everyone expects that. But it goes way further than the deep wilderness.
Pull off Highway 2 a couple miles past Index and watch your signal disappear. Drive down to Rainier and lose bars before you’ve even hit the park boundary. Camp anywhere along the coast between the Oregon border and the Strait and you’re essentially offline. Even spots that feel like they should have coverage — a mile or two off I-90, a state park an hour from Seattle, a campground with a paved road and a host on site — regularly have nothing.
This isn’t edge-case stuff. These are the places PNW people actually go. The signal map looks reasonable until you leave the highway corridor, and then it falls apart fast. If you’ve spent any real time camping in Washington or Oregon, you’ve already made peace with the fact that Verizon and T-Mobile have a very different definition of “coverage” than you do.
Extended dispersed camping is part of the culture here. Washington’s WDFW access areas, Okanogan-Wenatchee National Forest, the vast stretches of BLM land in eastern Oregon — PNW campers often stay put for days or weeks at a stretch. That’s a different use case than a weekend in a state park with hookups. You need internet that works where you actually are.
Remote work is no longer a novelty. A lot of people using these campsites are working out of them. The van life thing isn’t just influencers anymore — it’s engineers, writers, consultants, and tradespeople who figured out they can do their jobs from a campsite. For those people, Starlink isn’t a luxury. It’s infrastructure.
Other use cases worth mentioning:
- Uploading content — if you’re shooting trail footage or reels, Starlink makes it practical to upload from camp rather than hunting for a coffee shop with decent upload speeds
- Rainy day entertainment — and it will rain, this is the PNW — streaming works flawlessly with Starlink when a hotspot would be throttled
- Emergency communication redundancy in areas where calling out isn’t possible
<!– IMAGE PLACEHOLDER 2 –> <!– PROMPT: Close-up shot of a Starlink dish on an adjustable aluminum stand, positioned in a small forest clearing. Long cable visible running across the ground through fallen leaves and ferns toward an out-of-focus van or RV in the background. Pacific Northwest forest floor details — sword ferns, moss, wet soil. Realistic outdoor photography, natural overcast light. –>
What Equipment You Need
The Starlink Kit
The core hardware is the same regardless of where you’re camping. The Starlink kit ships with the dish (they call it “Dishy”), a router, cables, and a basic stand. It’s genuinely plug-and-play for the first setup.
The question for van and RV campers is which plan you want.
- Starlink Roam is designed for mobile use. It allows you to use the dish at any location rather than a fixed service address, which is exactly what camping requires. This is what you want. Plan runs around $150/month.
- Standard Residential is cheaper at $120–$140/month but is tied to a service address. Technically you can pause and reactivate it, but it’s not built for the use case.
Hardware runs around $599 for the standard kit. If you’re buying specifically for camping, look for the Roam/Mobile kit designation.
Extension Cables
This is where most van life guides leave money on the table. The cable that ships with the kit is fine if you’re parking in a field. In the PNW, you’re rarely parking in a field.
The official Starlink rectangular dish extension cable lets you physically separate the dish from the router by a meaningful distance. That means you can park your van under a tree for shade and shade cover, run the cable out to a clearing 20–30 feet away, and put the dish where it can actually see the sky.
Buy this before your first trip. It’s cheap, it’s small, and you will need it.
Adjustable Stands
The standard Starlink stand is fine for flat, open ground. For PNW camping — which usually means uneven terrain, brush, and the need to angle around specific trees — something like the Futrue Wolker Starlink Adjustable Stand gives you tilt and angle adjustment. That matters more than it sounds. You’re often not looking for a fully open sky — you’re looking to thread the dish’s view through a gap in the canopy. An adjustable stand lets you tune that precisely rather than shimming rocks under the base and hoping.
The Starlink App
Don’t skip this. The obstruction checker in the app shows you exactly what’s blocking the satellite view from any position. Use it before you commit to a campsite if you’re on the fence, and definitely use it before you set up, not after. It’s the difference between five minutes of repositioning and an hour of troubleshooting.
Power: The Real Conversation
Starlink draws 50–100 watts per hour. That’s not nothing, and the usual advice — “just get a power station” — skips some important context for PNW camping specifically.
What Capacity You Actually Need
A 1,000Wh power station gives you roughly 10–20 hours of Starlink use before it’s dead. For a weekend trip where you’re running the dish 4–6 hours a day, that’s workable. For a week-long trip, you need a way to recharge.
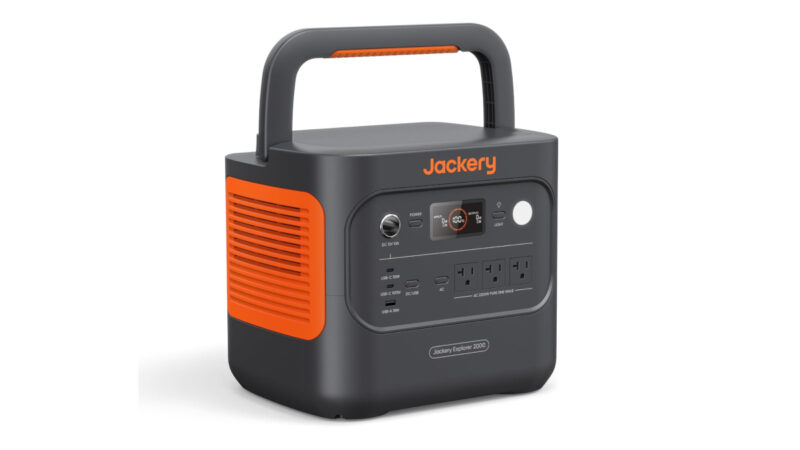
The BLUETTI Elite 100 (1,024Wh) and Jackery Explorer 1000 are both solid options at this capacity tier. Either handles Starlink with room left for lighting, phone charging, and the occasional laptop session.
For longer trips or heavier use, step up to a 2,000Wh station or a proper lithium battery bank with an inverter.
Solar in the PNW — An Honest Assessment
Here’s what the van life content from Arizona doesn’t tell you: the PNW is not a solar-friendly environment for half the year.
October through April, you’re looking at overcast skies the majority of the time. A 200W panel in Seattle in November is not producing 200W. You’ll get output, but it’s unpredictable and often insufficient for full recharge during the day.
That said, solar is still worth having as part of the system — it just can’t be your only charging plan. A 200W panel paired with a 1,000Wh station works fine in summer. In fall and winter, assume you’re supplementing rather than sustaining.
What actually works:
- A DC-DC charger off your alternator is your most reliable charging option in the PNW. Drive an hour, put 200–400Wh back in the bank. It’s not glamorous but it works on cloudy days when solar doesn’t.
- Shore power when you’re at an RV hookup site — obvious, but worth noting. Charge fully before heading into dispersed territory.
- Generator as a backup for extended remote stays — not everyone wants to run one, but if you’re working remotely for two weeks in the North Cascades in October, having one as a backup is practical.
One Setting You Need to Know About
Starlink has a sleep schedule in the app settings. Set it to turn off overnight. You don’t need internet at 3am, and you do need those watts in the morning when you’re on a call.

The PNW Reality: Camping in the Trees
This is the section that doesn’t exist in most Starlink van life guides, because most of those guides are written by people camping in Utah.
The Canopy Problem
Old-growth Douglas fir and western red cedar don’t just block some of the sky. A mature grove blocks all of it. Even a single large branch sitting in the wrong quadrant of your signal path will cause the dish to drop and reconnect constantly.
The Starlink dish needs a roughly 100-degree clear view of the sky above the horizon to maintain a stable connection. In a dense PNW forest, that’s genuinely hard to get from a static position beside your rig.
Getting Creative with Placement
This is where the extension cable and adjustable stand earn their keep.
Long cable runs to a clearing. Park your van wherever makes sense for the site. Run the extension cable to the nearest open spot — a meadow edge, a road shoulder, a rocky outcrop. Even 20–30 feet of separation often solves the problem entirely.
Angle the dish through canopy gaps. Use the obstruction checker to find which direction is clearest, then use an adjustable stand to tilt the dish toward that opening. You often don’t need a fully open sky — you need one good window through the trees.
Get the dish up off the ground. A telescoping pole, a painter’s pole, or even lashing the stand to your roof rack or a nearby dead tree can get the dish above the brush line where lower-angle obstructions aren’t an issue.
Park at the edge of the clearing, not the center. Counter-intuitive, but if you position the van at the treeline rather than under the canopy, you can often get the dish on a short extension into the open area while the van stays shaded.
Scout before you set up. Walk the site with the app open before you pop anything out. Thirty seconds of app work will tell you exactly where to put the dish. This is especially useful on sites you’ve never camped before.
What Won’t Help
Fog and rain are generally not a meaningful problem. Starlink handles precipitation well, and PNW moisture isn’t going to take down your signal.
Deep river valleys and steep-walled canyon campsites are a different story. If the terrain itself is blocking the sky — not just trees — there may not be a creative solution. Some of the most beautiful campsites in the Olympics and North Cascades are simply in too narrow a gap. Know going in that this is a possibility and plan accordingly.
Starlink Costs: What You’re Actually Spending
Hardware
- Starlink Standard/Roam Kit: ~$599 (dish, router, cables, basic stand)
- Adjustable stand: ~$30–$60
- Extension cable: ~$40–$80 depending on length
- Protective carrying case: ~$40–$80 if you’re traveling with the kit regularly
All-in, budget $700–$800 to have a properly equipped mobile setup.
Monthly Service
- Roam Plan: ~$150/month
- Pause when not in use: Yes, you can pause the Roam plan. If you’re only doing extended camping trips a few months a year, this matters.
The Math Against Alternatives
Most campground Wi-Fi ranges from “technically functional” to “openly hostile to the concept of uploading anything.” That is of course IF they have Wi-Fi at all. Cellular hotspot plans max out at 30–50GB of high-speed data before throttling, and in the PNW dead zones where Starlink actually shines, your hotspot isn’t working anyway.
If you’re working remotely and one missed deadline or dropped client call costs you more than $150, Starlink pays for itself in a single month. If you’re a recreational camper on occasional trips, it’s a harder sell — but pausing the service between seasons keeps the math reasonable.
Pros and Cons for PNW Van & RV Campers
| Factor | Starlink | Cellular Hotspot | Campground Wi-Fi |
|---|---|---|---|
| Speed | 50–250 Mbps | 5–50 Mbps (when it works) | 1–20 Mbps |
| Coverage in PNW dead zones | Excellent | Poor to none | N/A |
| Works under dense tree canopy | With effort | Not applicable | N/A |
| Power draw | 50–100W/hr | Minimal | None |
| Setup time | 10–20 minutes | Instant | None |
| Monthly cost | ~$150 | $50–$100 | Usually included |
| Upfront cost | ~$600+ | $0–$200 | $0 |
Is Starlink Right for Your Trip Style?
You probably want it if:
- You’re doing extended dispersed camping in the Cascades, Olympics, or other remote PNW terrain
- You work remotely and need reliable video calls and file uploads from camp
- You create content and need practical upload speeds
- You’re doing multi-week van or RV trips where cellular dead zones are the norm
You can probably skip it if:
- You’re doing weekend trips at established campgrounds with reasonable cell coverage
- You’re specifically going off-grid to unplug — and that’s the point
- You’re at RV hookup sites where your Verizon or T-Mobile signal is solid
- You’re a casual camper who doesn’t need anything heavier than email and maps
The sweet spot for this tool is the serious PNW dispersed camper who’s out for more than a weekend and needs the internet to actually work. If that’s you, there’s nothing else that comes close.
Setting It Up: Step by Step
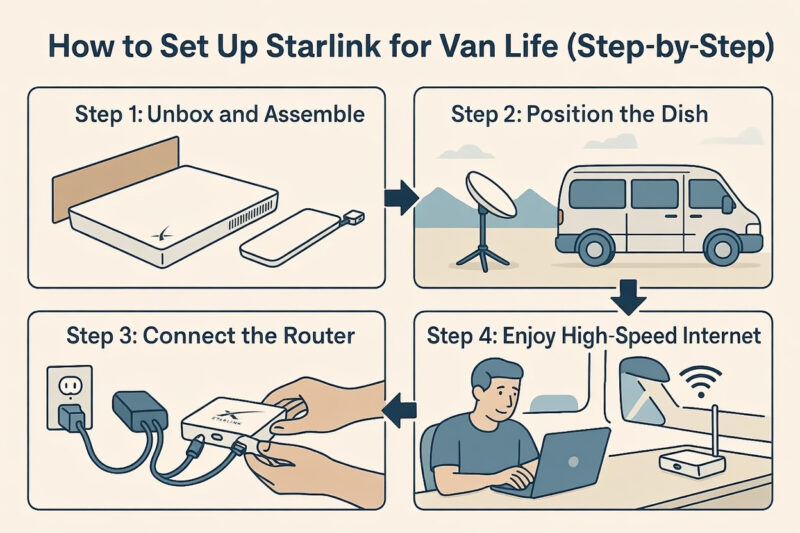
1. Unbox and inventory. Dish, router, cable, stand. Make sure the extension cable and adjustable stand are in your kit bag before you leave home.
2. Scout the site with the app. Before you set up camp, walk the area with the Starlink app open and run the obstruction check from a few different positions. Pick your dish location first.
3. Run your cable. If you’re using an extension cable, lay it from your intended dish position back to where the router will live inside the van or RV.
4. Mount and angle the dish. Use the adjustable stand to angle toward your clearest sky window. The dish will self-align once powered, but getting it close manually speeds up acquisition.
5. Power and connect. Plug into your power station or inverter. The router creates a Wi-Fi network — connect your devices.
6. Set the sleep schedule. In the app, set Starlink to power down during overnight hours. Conserves battery, and you won’t miss it.
7. You’re online. From unpacking to working, most setups take 15–20 minutes once you know the drill.
Final Thoughts
Starlink isn’t magic in the PNW woods. The trees are real, the power math is real, and there are campsites where it simply won’t work. But for the kind of camping that defines this region — deep in national forest, off logging roads, far enough from a paved highway that your cell signal is a memory — it’s the closest thing to a real solution that exists.
Buy the extension cable. Get the adjustable stand. Use the obstruction checker before you set up. And accept that some of the best campsites in the Pacific Northwest are best enjoyed offline.
For the rest of them, you’ve got 200 Mbps and a view of the trees.